
How to Take Wedding Dress Measurements at Home: What to Wear
- 23 hours ago
- 11 min read

Written by Orly Lauren Doubinsky, Studio RÉN founder and senior womenswear technical designer with 15 years in fit development, garment construction, pattern evaluation, and global production.
To take accurate wedding dress measurements at home, wear a non-padded bra (or the support garment your gown will actually use), skip shapewear unless you will wear it on the day, keep clothing snug and thin, stand upright and relaxed, and have someone else hold the tape level. What you wear and how you stand while measuring set the shape your gown is built around. Every layer that lifts, compresses, or shifts your body moves the measurement, which moves the pattern, which moves the fit.
What You'll Learn
Exactly what to wear, and remove, so your measurements describe your real body rather than a temporary shape.
How a padded bra, shapewear, heel height, and posture each change a specific seam, dart, or hemline on the finished gown.
How to physically take the core measurements at home, and why the conditions matter even more for a remote, made-to-measure gown built from a bride-specific avatar.
Table of Contents
Follow your maker's protocol first
Before anything else: follow the measurement instructions supplied by the person making your gown. Different designers record some measurements differently, especially floor length. Studio RÉN uses one consistent protocol across the measurement guidance, the bride-specific avatar, and the production specifications, and this guide describes that protocol. Mixing methods can create a measurement set built from different landmarks and assumptions, making it difficult to interpret consistently, so take your full set one way.
Why what you wear changes the measurement
A measurement records your body at one moment, under one set of conditions. Change the conditions and you change the record, even if your body has not changed. A bra that lifts the bust, shapewear that compresses the waist, or a downward tilt of the head while measuring length all produce numbers that describe a body you will not actually be wearing. The gown is then built to that shape.
This is different from buying off the rack. Ready-to-wear starts from a standard size and is corrected afterward through alterations. Made-to-measure construction uses your body data to develop or modify the pattern more directly, so inconsistent measurements are carried into fit and proportion decisions instead of being corrected only through standard-size alterations.

What each condition does: quick reference
Before the detailed steps, here is the whole argument at a glance. Each measuring condition changes something on your body, which changes something on the gown.
Measuring condition | What changes on the body | What can change on the gown |
Padded or push-up bra | Bust apex lifts and projects forward | Dart, cup, princess seam, neckline edge |
Shapewear you won't wear on the day | Waist and hip profile redistribute | Closure fit, torso ease, skirt fit |
Looking down while measuring | Front torso and neck position shorten | Hollow-to-floor and front length |
Tape pulled too tight | Base circumference reads smaller | Wearing ease, closure, movement |
Uneven or shifting posture | Left-to-right balance changes | Hemline, shoulder, neckline, skirt hang |
How to Take Wedding Dress Measurements- What you need before you start:

A flexible fabric measuring tape
A narrow length of elastic to mark the natural waist
The correct bra or support garment
A helper
A full-length mirror
A place to record every measurement immediately
Your wedding shoes, or the closest available alternative
Take each measurement twice without looking at the first result. If the two numbers differ, take it a third time. Do not average two conflicting measurements, and do not round the number down.
What to wear, and how to stand
Bra and bust support. Wear a non-padded bra that reflects your natural bust shape. If your gown will have its own built-in support, cups, or internal corsetry, follow your maker's instruction on what to wear underneath, because built-in structure repositions the bust differently from an everyday bra. Whatever you wear, record exactly which support garment it was. A padded or push-up bra raises the bust apex, the most projecting point of the bust, and the apex is a construction landmark, not a cosmetic detail. The dart points to it, the princess seam curves around it, and the neckline is drafted in relation to it.
Shapewear. Wear shapewear only if you will wear the same shapewear under the gown on the day. Then it is genuinely part of the body the gown is built for. If you measure in shapewear you will not actually wear, the pattern gets built around a smaller, redistributed torso that will not be there, and the finished gown may close more tightly or sit differently through the torso and hips. Decide first whether shapewear is part of your wedding day, then measure in the state that matches that decision, and note which state it is.
Clothing. Keep it snug and thin, or measure against bare skin where you can. Bulky layers add width that is not yours.
Posture. Stand upright and relaxed, weight even on both feet, arms down, looking straight ahead, not down at the tape. Looking down shortens the front torso and drops your recorded length. Just as important, hold the same posture across the whole set. If you stand tall for the bust, slump for the waist, and shift your weight for the hips, the measurements describe three different bodies, and the pattern drafted from them belongs to none of them.
Tape tension. Hold the tape firm, level, and flat against the body, snug but not compressing. Pulling it tight to get a smaller number reduces the recorded base circumference, so the intended ease, or the intended compression in a structured or corseted bodice, is applied to the wrong starting point. Your job is to provide a clean, uncompressed base measurement unless your maker tells you otherwise.
A helper. You can take these measurements at home, but you should not take every one entirely by yourself. Circumferences and lengths stay level and accurate when a second person holds the tape while you keep a natural posture. Self-measuring alone is a common source of tilted circumferences and distorted vertical measurements.
How to take the core measurements at home
STEP 01
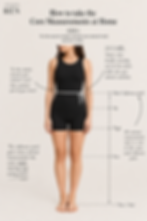
PRO TIP: Use a soft measuring tape and the conditions above. First, tie the narrow elastic around your natural waist and let it settle; it gives every vertical measurement the same stable reference point. Here is how to physically locate and take each core measurement. This covers the how; for the full list of which measurements a custom gown requires and what each one controls, see the linked technical guide further down.
STEP 02- The Bodice
A REMINDER- Before Measuring the Bodice
Wear a non-padded bra and, only if planned for the wedding day, the same shapewear you will wear under the gown. Measure over undergarments or very thin, close-fitting clothing.
Keep the tape level, flat, and snug without compressing the body. You should be able to breathe normally. Measure each point twice, resetting the tape between attempts. If the results differ, take it a third time.

Full bust. Measure around the fullest circumference of the bust, passing over both bust apexes and keeping the tape level across the back, not riding up.

High bust. Around the torso just above the bust, under the arms and across the top of the chest. The relationship between the high-bust and full-bust measurements helps the designer assess bust prominence and determine how much shaping the bodice requires.

Underbust. Directly under the bust where a bra band sits, snug and level.


Natural waist. The natural waist is where the torso naturally creases when you bend gently to one side. This is the point you marked with elastic. Tape level there.
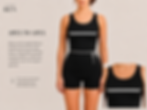
Bust apex and apex-to-apex. The apex is the most projecting point of each bust. Apex-to-apex is the straight distance between the two points. These position the darts and the neckline, so take them carefully in your true support garment.
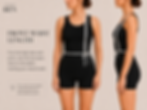
Front waist length. From the HIGH side-neck point, over the bust apex, down to the elastic marking your natural waist.
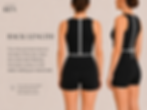
Back length. From the prominent bone at the base of the neck, down the center back following the body's contour, to the elastic marking your natural waist.

Bicep, if sleeves are planned. Measure around the fullest part of the upper arm with the arm relaxed.

Sleeve length, if sleeves are planned. Measure from the shoulder point, along the outside of a slightly bent arm, over the elbow to the point where you want the sleeve to end at the wrist.

Wrist circumference, if sleeves are planned. Measure around the wrist at the point where the sleeve will end, keeping the tape snug but not tight.
STEP 03- The Skirt
Length and your wedding shoes
Length is the one measurement where your shoes change the number, so Studio RÉN records both a barefoot body length and the corresponding length in the intended wedding shoes. Take these two length measurements barefoot first, so there is a clean record of your true body:

High hip and full hip. High hip is taken a set distance below the natural waist, around the upper hip; Full hip is around the fullest part of the seat and hips, feet together, tape level.

Waist-to-floor. From the natural-waist elastic to the floor, following the side of the body and keeping the tape vertical.

Hollow-to-floor. From the hollow between the collarbones at center front, held vertically down to the floor, while you look straight ahead. Follow the route specified on your Studio RÉN form if it differs.
PRO TIP:
Then account for the wedding shoe, in this order of preference:
Take the length again wearing your actual wedding shoes, if you already have them.
If not, measure in shoes of a similar heel height.
If you have neither, keep the barefoot length and record your estimated heel height as a separate number.

You want both figures because they do different jobs. The barefoot length anchors your true proportions on the avatar. The heel height determines where the front hemline breaks, whether you want it grazing the floor or sitting just above the shoe, and how the train length falls behind you. Heel height is a length input, not an afterthought, and keeping it as its own recorded number means that if your shoe decision changes later, the hemline can be adjusted cleanly without re-measuring everything.
One limit worth knowing: an estimated heel height is enough for early proportion planning, but not for final hem confirmation. A four-inch stiletto and a four-inch platform do not position the body identically, so before production length is finalized, Studio RÉN needs the actual wedding shoe, or a shoe with the same heel height and pitch.
The Technical Designer's View
Here is what fifteen years in technical design and fit development teaches that a checklist cannot: one wrong condition does not stay contained. It travels through the pattern.
Follow the padded-bra example all the way through. Suppose a padded bra lifts the apex by two centimeters. The bust dart is drafted to point at that raised apex, so the dart angle changes. Because the dart moved, the fullness it releases lands higher than your real bust.
The princess seam, which curves around the apex, now curves around a point that is not on your body, so it stands proud of the chest instead of following it. And the neckline, drafted in relation to the apex, is cut for a bust that projects further forward than yours. When the gown is later worn with your natural bust position, the shaping no longer aligns with your body, and along the top edge the neckline stands away and gaps.
One condition, four construction consequences, none of them a sewing fault, all of them traceable to a bra worn for twenty minutes during measuring. This is why "wear fitted clothing" is necessary but incomplete advice: it tells you what to do without telling you what the wrong choice costs. The measurement is the first line of the pattern, and the pattern inherits every condition you measured under.
The same logic runs through the rest of the list. Shapewear you won't wear builds a torso that isn't there. A downward glance shortens a front. A tight tape shifts the base every ease decision is built on. Each one is a small decision at the measuring stage that becomes a fixed feature of the finished gown.
Measurements tell a designer where the gown must fit. They do not explain what you want the gown to become. Use the free Custom Gown Vision Guide to clarify the silhouette, fabric, neckline, and support direction your measurements will need to serve. Download the Custom Gown Vision Guide.

How Studio RÉN uses these measurements
At Studio RÉN, your measurements do not go into a size chart. They build a bride-specific avatar, a 3D model that reflects the measurements and body landmarks entered into it, and your gown is developed and previewed on that avatar before any fabric is cut. The avatar does not correct bad input. It reflects whatever body your measurements describe, which is exactly why the conditions in this guide matter so much for a remote, made-to-measure gown.
When the measurements are taken under consistent, documented conditions, the avatar more closely represents the proportions and landmarks recorded in your measurement set, and the 3D preview helps you evaluate how the silhouette, seam placement, neckline, and hemline are expected to read before production begins. That is what lets a fully remote process work without an in-person fitting: not a guarantee of exact final fit, but accurate input feeding a preview you can review and correct before anything is cut.

Which measurements you actually need
This guide covers how to take the measurements and under what conditions. The separate question of which measurements a custom gown requires, and why bust, waist, and hips alone are never enough, is covered in depth in our guide to custom wedding dress measurements and why three numbers are not enough. Read that for the full set and what each measurement controls, and if you want to understand how the preview stage works, see how a 3D wedding dress preview reduces custom gown risk. Take the measurements using the conditions on this page, and your data will be both complete and accurate.
Frequently asked questions
What should I wear when taking my own wedding dress measurements?
Wear a non-padded bra in your natural bust shape, or the support garment your maker specifies if the gown has built-in structure. Skip shapewear unless you will wear it on the day. Keep clothing snug and thin, or measure on bare skin, and stand upright with even weight.
What bra should I wear for wedding dress measurements?
A non-padded bra that reflects your true bust shape, or whatever your maker instructs if the gown has its own cups or corsetry. A padded or push-up bra raises the bust apex, which can shift where the dart, princess seam, and neckline are positioned, so the finished gown may fit a higher bust than yours and gap at the neckline. Always record which support garment you wore.
Should I wear shapewear when taking my measurements?
Only if you will wear the same shapewear under the gown on the wedding day. Shapewear compresses and redistributes your waist and hips, so measuring in shapewear you will not actually wear builds the gown around a body that will not exist on the day, and it may sit tightly.
Do I wear shoes when measuring for a wedding dress?
Take the standing length barefoot first for a clean record, then account for your wedding shoe: measure again in the actual shoes if you have them, in similar-heel-height shoes if you do not, or record your estimated heel height as a separate number. Heel height sets where the hemline breaks and how the train falls, and the actual shoe is needed before final hem length.
How tight should the measuring tape be?
Snug and level, flat against the body, without compressing. Pulling the tape tight reduces the recorded circumference, so the intended ease is applied to the wrong starting point. Your maker adds the required ease, or compression for a structured bodice, at the pattern stage, so provide a clean base measurement.
Can I take my own wedding dress measurements at home?
You can take them at home, but you should not take every measurement entirely by yourself. Have someone else hold the tape so it stays level while you keep a natural, consistent posture. Consistency across the whole set matters as much as accuracy on any single number.
Studio RÉN is a custom bridal platform creating made-to-measure wedding dresses through bride-specific avatars, 3D gown previews, and custom design development. Brides can preview the fit, silhouette, and design direction of their gown before production begins.
About the author: Orly Lauren Doubinsky is the founder of Studio RÉN and a senior womenswear technical designer with roughly fifteen years in fit development, garment construction, pattern evaluation, and global production, including senior roles across established fashion houses. More about Orly and Studio RÉN.

